Lessons in Film Digitizing
Background
Perhaps the most economical way to turn developed film into a digital file is to use a reasonably capable camera to take a picture of the film. Desktop flatbed scanners, including those integrated on many printers, can accomplish this, though they lack the ability to focus the scanner's good resolution into an area as small as the film. Thus, the portion of the flatbed scan actually containing information from the film is often disappointingly small. Professional film scanners have purpose-made sensors that allow for high-resolution, low-noise film scans, but unless you have many hundreds (or thousands) of film strips to digitize, it is quite unlikely that you would have this sort of scanner on hand (or feel like buying one). In this article, I use a Canon Rebel T7 for a couple demonstrations, and a Nikon D700 for the final image.
There are a few things to keep in mind here. The film must be in reasonably good condition, the particular frame to be digitized must be in focus and taken with reasonably good settings, and you must take care not to introduce too much error to it by virtue of the digitizing process. Even if many things have gone wrong, it's possible to use editing techniques to restore or even regenerate the image, but doing this takes time, knowledge, extra software, and sometimes it's nice to just open something on the computer and have a good result in a few seconds.
This article is not about restoration, so I'll choose film in decent condition. Now, what are some factors we might want to pay attention to?
Ensuring the camera and film are orthogonal
As the film will be quite close to the camera since we're trying to fill as much of the frame as we can, the focus plane will likely be very shallow. This will depend on the exact setup you're using, but in my case, I had maybe 0.5mm to work with. Should the film by slanted relative to the camera, it will place large portions of the image neatly out of focus. Unfortunately, it can sometimes be hard to distinguish when the image is defocused due to the conditions of the original shot, and because of digitizing error.
In this example, note how the image on the right is uniformly more blurry than the left. The presence of the focus issue is particularly highlighted in how the date digits are also defocused.

Ensuring the film is not warped
If you are using any method to hold the film that does not sandwich it between clear plates or otherwise forcibly flatten it out, and the film is not already very flat, it is very easy to have it warp and be partially out of focus. In this example, we can see that much of the film has slipped in front of the focus plane.

Back away from display-based light sources
Here, I'm using my phone with a blank white screen at max brightness to illuminate the film. The strip has been placed right on top of the screen and you can actually see the individual pixels in the "scan." This absolutely destroys the final scan quality. It's tempting to just put the film on the screen, but you should back it away, or do something to evenly diffuse the light.
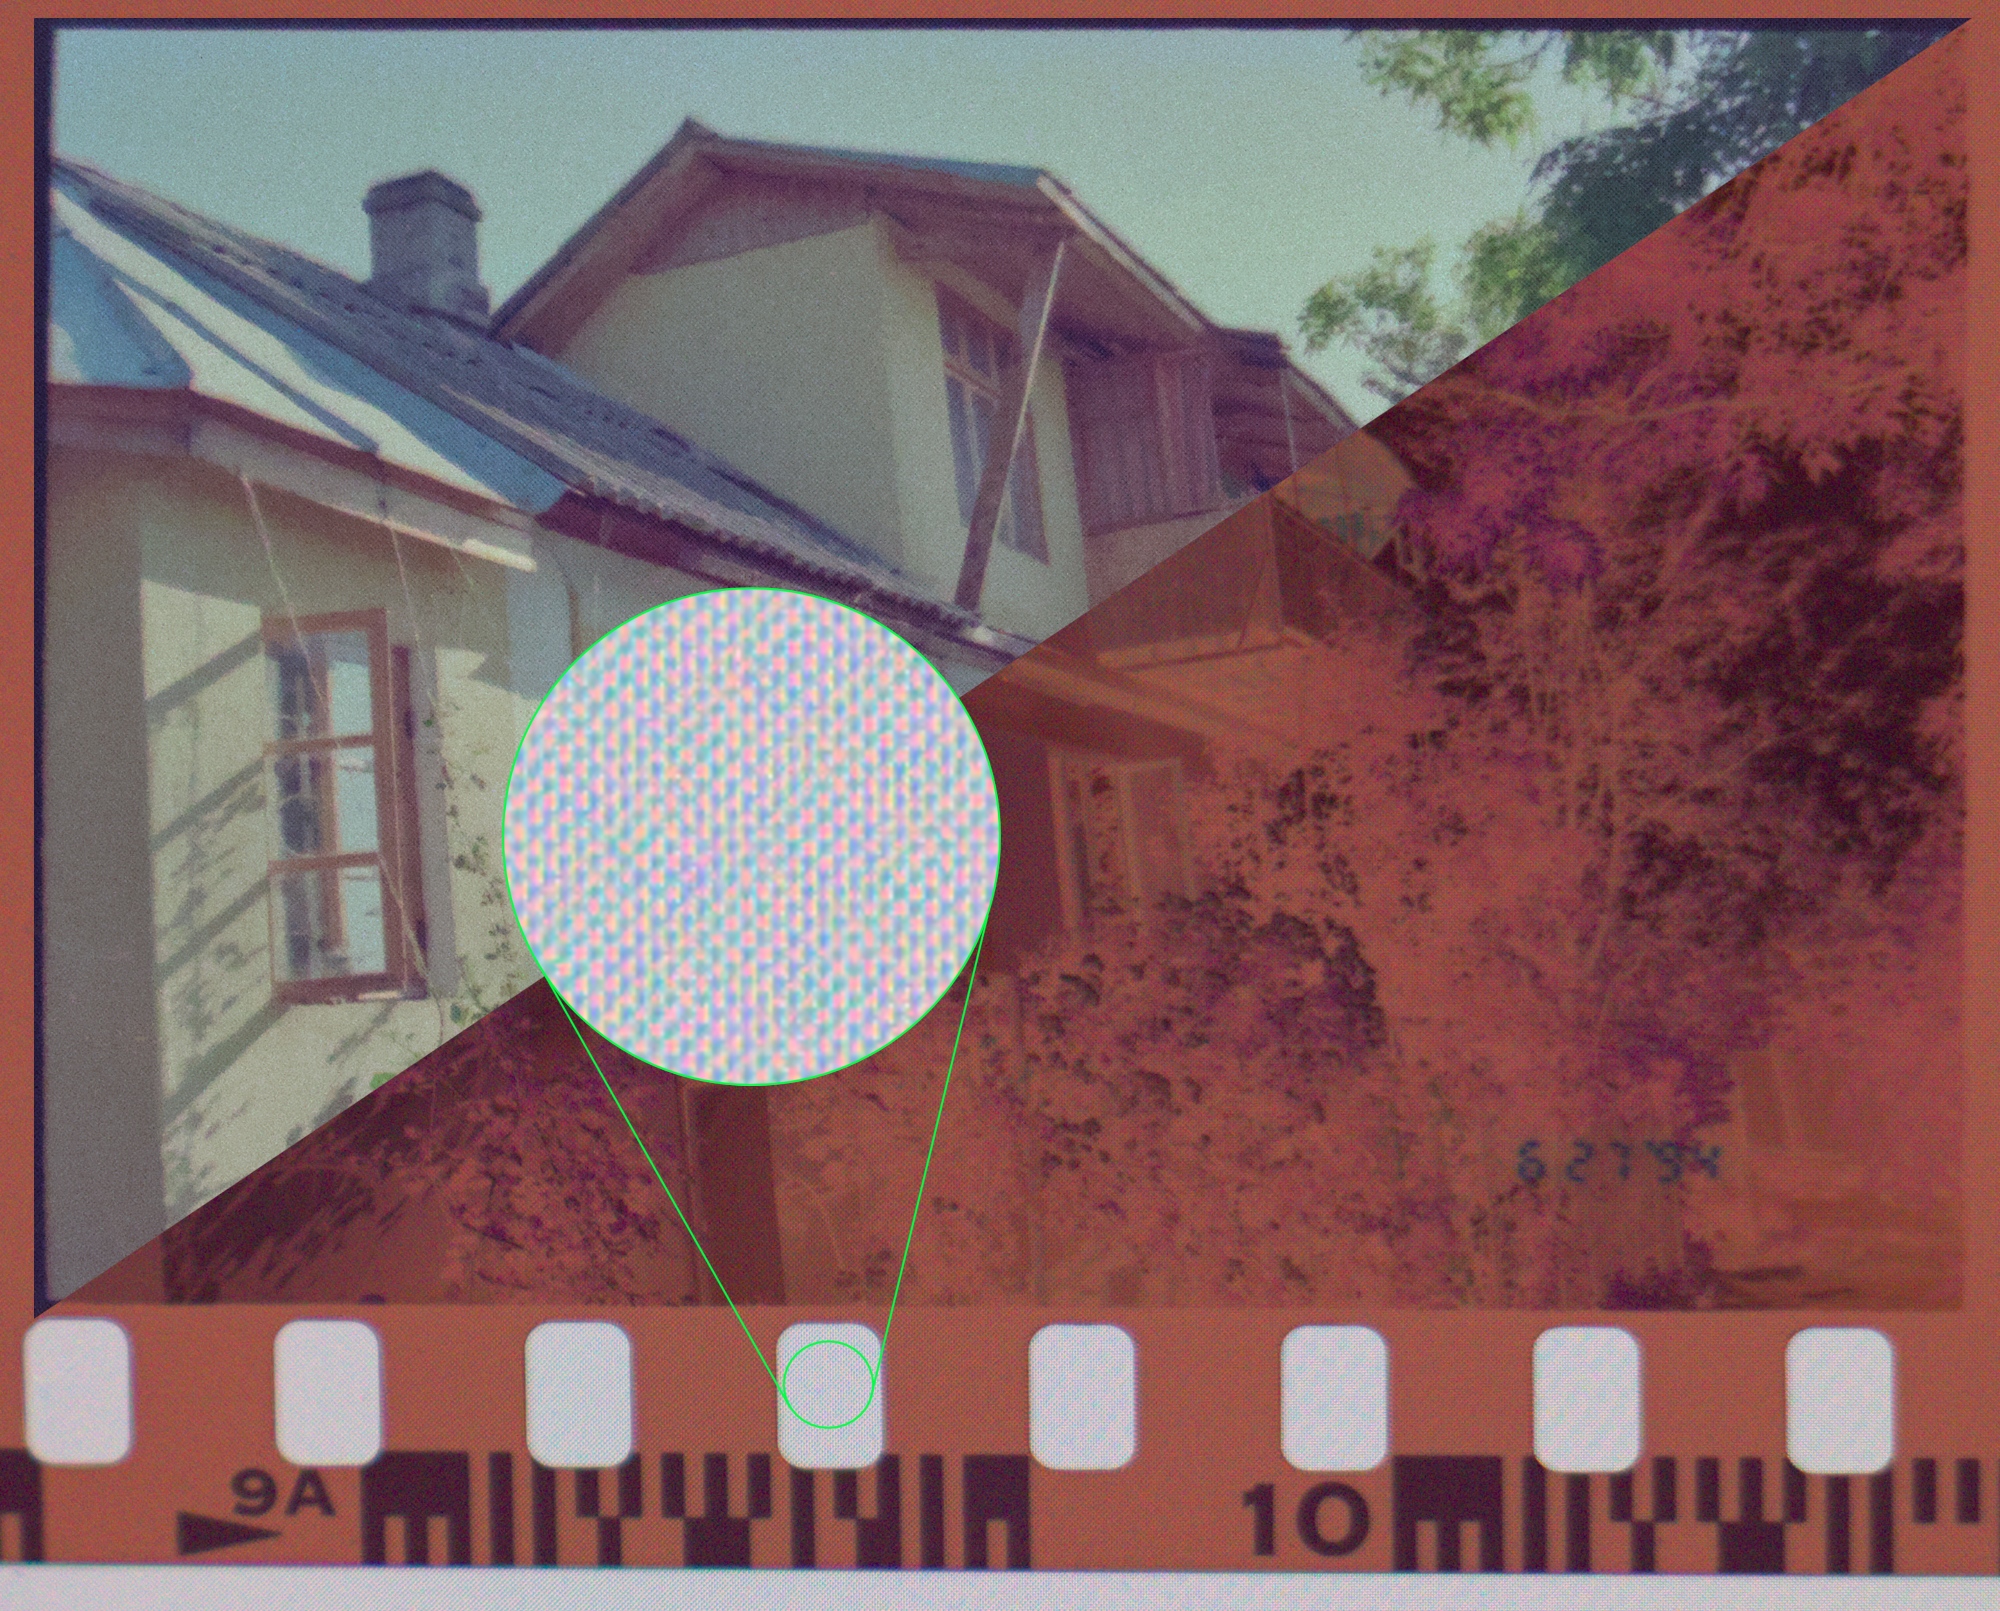
Excessive sensor noise
It is totally possible to get an acceptable result by handholding the camera, placing the film over a light source, and carefully taking a picture of it. However, the jitter that your hands can introduce encourages you to shorten the shutter speed, which in turn encourages you to raise the ISO. I had left my Canon T7 on program mode and found it used ISO 3200 for this shot. Vastly excessive, yes, but it also illustrates a good point. The noise patterns introduced rival the size of features such as the leaves and chainlink fence, rendering those edges nigh undecipherable. Manually set the ISO low and take measures to work with it.

I'm sure there are many more ways to end up with a subpar result, but those were the issues I encountered.
Here's the first jig I put together to scan film. It's a cup with some pieces of cardboard taped to it. The foam is there to level the cup when sitting it on a table. I used some socks to force the edges of the film up, thus straightening it out more. I used brown socks in this example, but I suspect that other colors may also work.

This technically works alright, and if you don't have much film to scan, I'd say just take a small box, cut some slits and a window in it, and use that. It's quite easy if you align the height of the film with the camera when the camera is rested on the table.
I wanted a bit more control and repeatability, so I used these stamped steel pieces (this kind of toy is known by a few names, including "Meccano," "Erector," and "Constructor") and a spare tripod head. My phone is held in place for light using part of the box it came in, and a couple hair elastics. There are some M2 bolts to go in the holes of the film, which I had to adapt to the steel frame using some nice cardboard (harvested from the same phone box), so the success of this approach hinges wildly on how accurately you can drill holes in cardboard and assemble children's toys. I also had to orient the tripods and all the items attached to them by hand, which could introduce a lot of error if you don't have a good eye for when objects are parallel.
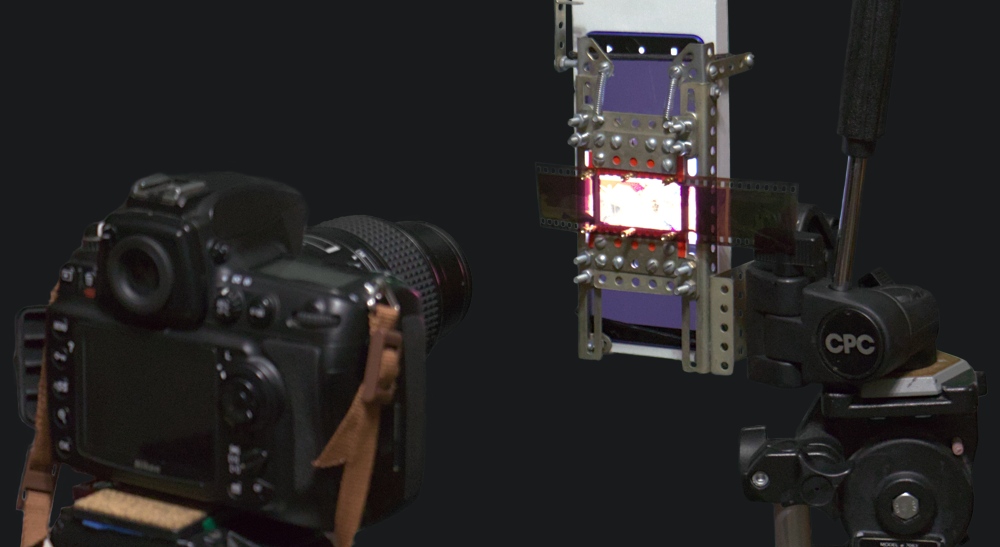
This setup worked okay, and provided repeatable results, but when it didn't work, it was a "skill issue." If I had to do this for a lot of film, I would get some high quality glass plates, and mount those, my light source, and my camera all accurately and solidly on one continuous mass, like a hardwood board or a bar of aluminum. The extrusions and roller bearings used for cheap 3d printers would work marvelously for a better quality digitizing jig.
Actually editing the image
Here, I have a color film negative. You can use this process for B&W and reversals. All of these take about the same editing time, if you use dedicated tools for it.
I will be using darktable's negadoctor module to do essentially all of the heavy lifting here. Besides that, I'm applying lens correction, rotation, some exposure, cropping, and the camera's white balance profile. That's it.
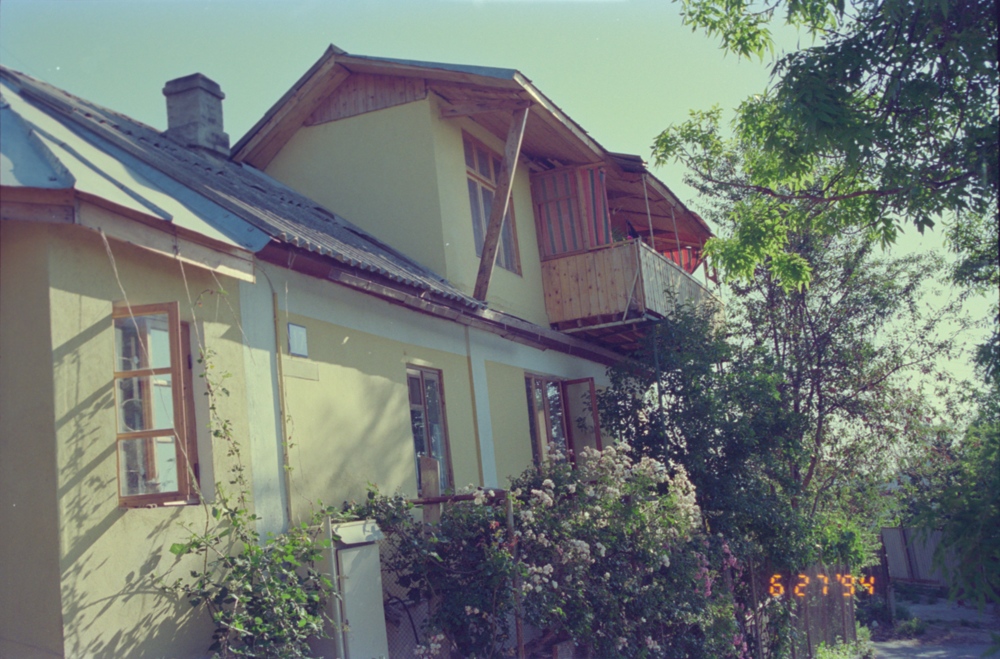
You can see I still managed to screw up my scan and ended up with a blurry top left corner. I composite in that area from another shot and get my final image:
Join me next time, where I'll be scanning large format film using a Game Boy Camera and a rig made out of cotton swabs.
Nick
You may also like: Photo Restoration Adventures