Photo Restoration Adventures
Have you ever looked at one of those photo restoration services and thought that their results are ok, but they fix damage by making the photos super blurry? How about a colorized black and white photo that looks like someone only had 3 crayons to do the job with?
We're going to discover exactly why it is that the best efforts of these professionals look so amateurish. Hint: it's because this kind of work is hard. And tedious.
Background
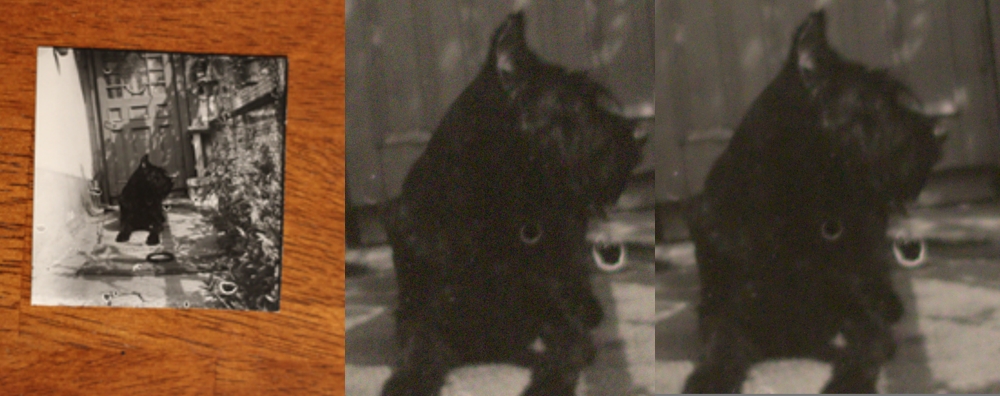
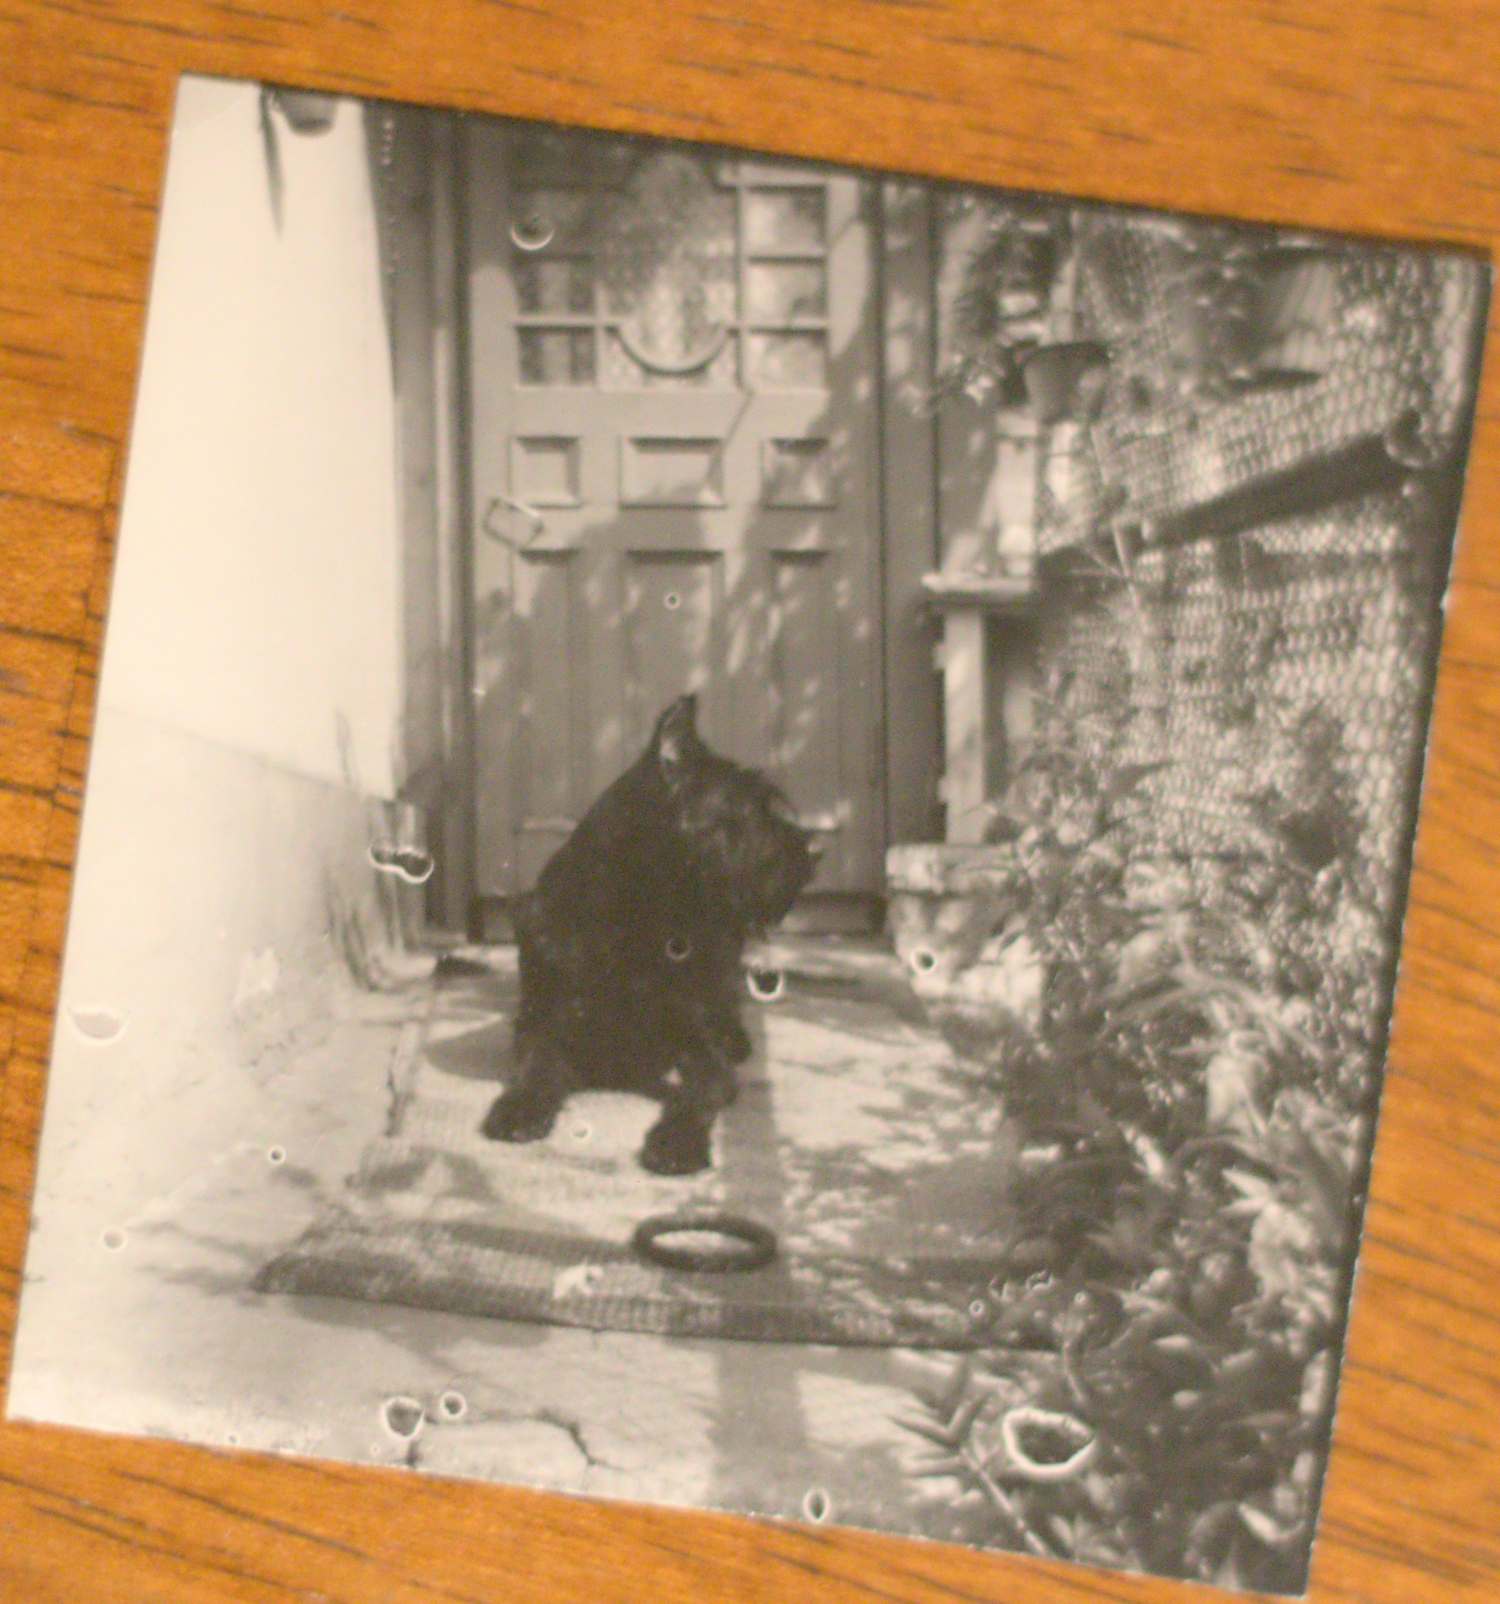
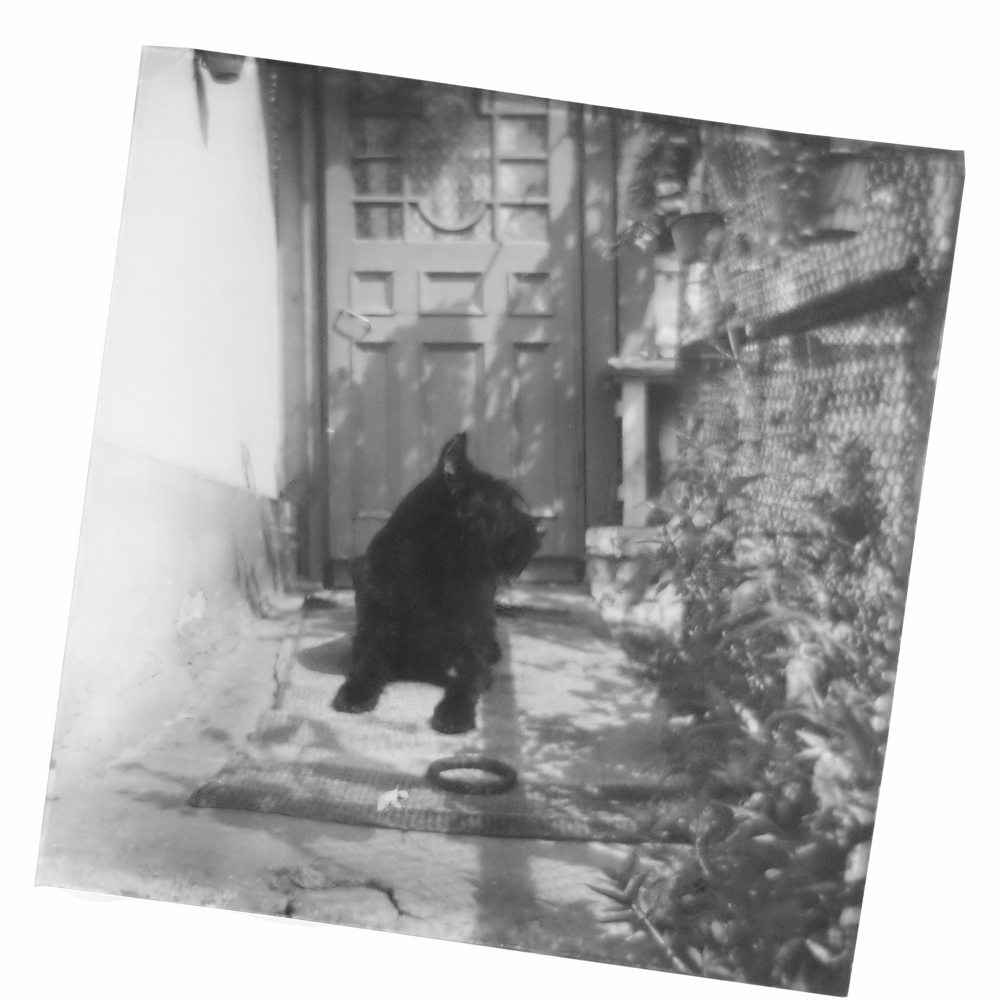
Starting off, we need a photo to restore. I looked through a few albums and poked around several boxes of photos that my parents have in a remote closet, and found that (un)fortunately, everything was in good condition. This made me wonder how photos end up in bad condition to begin with. Eventually, I settled on a tiny image of what I'm assuming is my mom's old dog, taken maybe 30 years ago in Ялта. Меаsuring 56 x 57mm, here is its size compared to standard photo paper:

It appears to have some form of damage that I'm not seeing mentioned on the basic articles on photo damage that I glanced over. To me it looks like some kind of damage to the film, perhaps exposure to flecks of moisture while the film was being handled. Not sure though.
Preparation
I "scanned" the photo by putting it on a dresser and taking a picture of it. Very sophisticated. I brought it into a raw editor (darktable) and removed some sensor noise using the raw denoise option. I was not super concerned about the chrominance noise, that would go away with desaturating the image. Looking back, I should have been more careful about how much contrast I lost on the raw import, and worried about the noise after trying to salvage details from the image.
After straightening it out, here is what we'll be working with for the majority of this project:
Repair
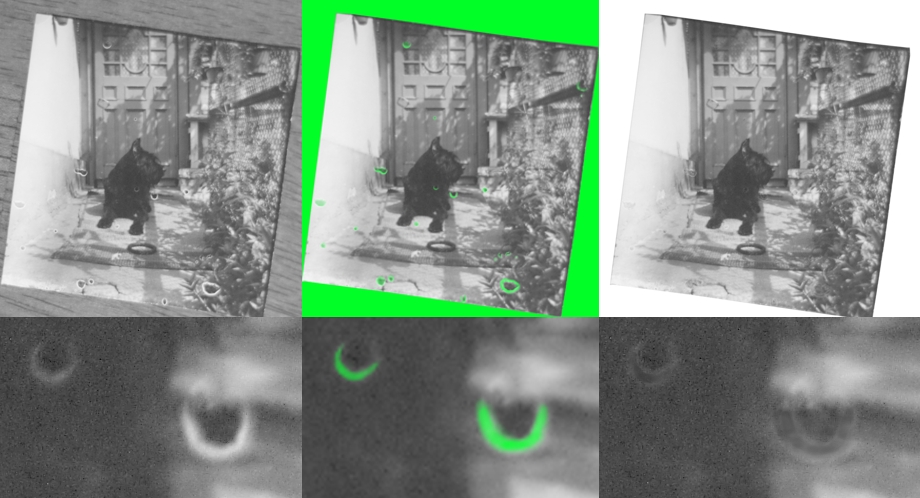
Next order of business is to fix the damage. The way I see this usually done is with the clone tool and healing brush. I'm not a super huge fan of this method, as the repaired places are both blurry, and the edit was done destructively. Here, I'm using a transparency mask and a green background underneath so it's very obvious where the image has been masked out. I mask out the damage, then put a blank white underneath it. I paint up with a black brush at low opacity until the tones in each spot roughly match the original image. If I were to fully repair the damage this way, I'd make the transparency mask cut into the original image more, and I'd have some texture between the original image and the patches underneath to give the patches a texture to match the image. However, I have some ideas I want to try for this project.
I feed the image into Stable Diffusion and set the denoising around 0.1. You can see in the next couple images that it takes quite a bit of liberty with the image, but since we're going to be using this generation for blending the patches anyway, I can put it on top of the original, make a transparency mask, paint in only the portions needed, and play around with the layer blending mode until it looks good. With better hardware, much more patience, or much better hardware and much, much more patience, I could generate either a higher res image to patch with, many more and I can cherrypick the best parts of each, or even train a model specifically for doing this kind of work and hope it makes better results. As is, each generation like this only takes a few seconds with my GTX 1070.
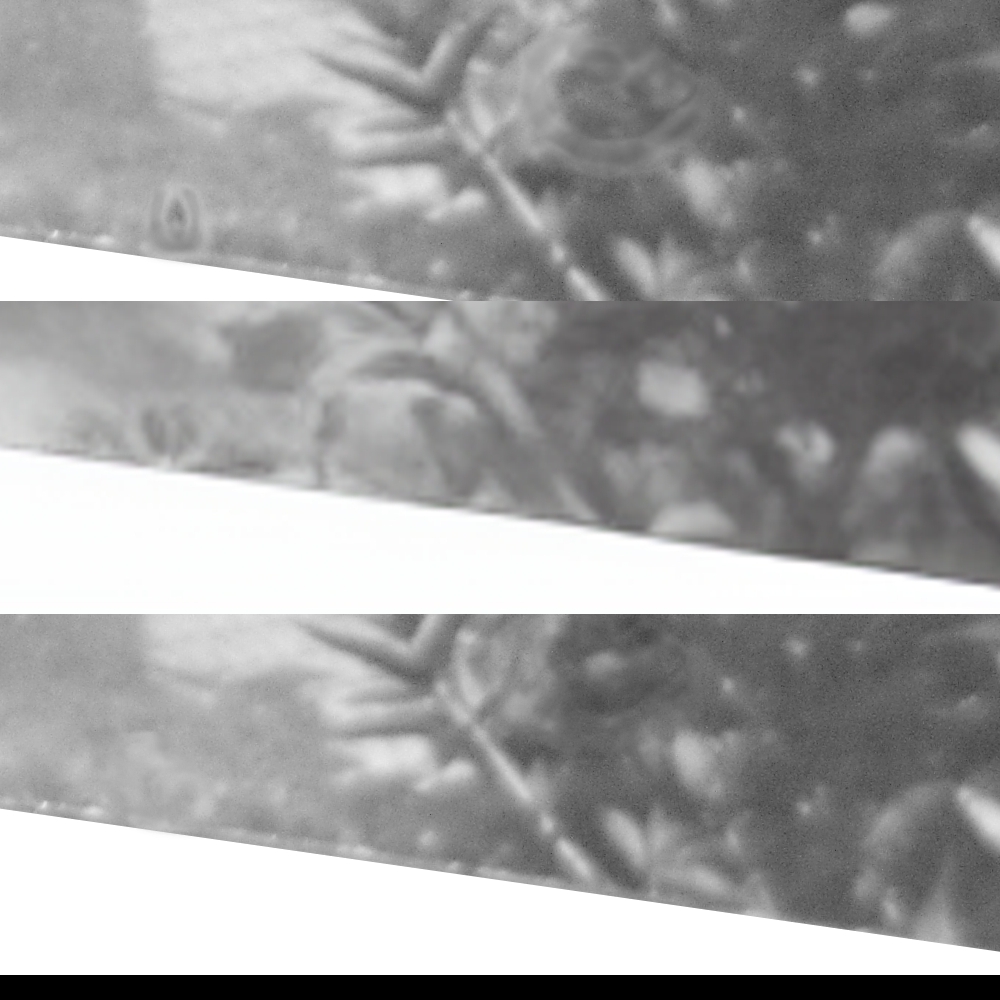
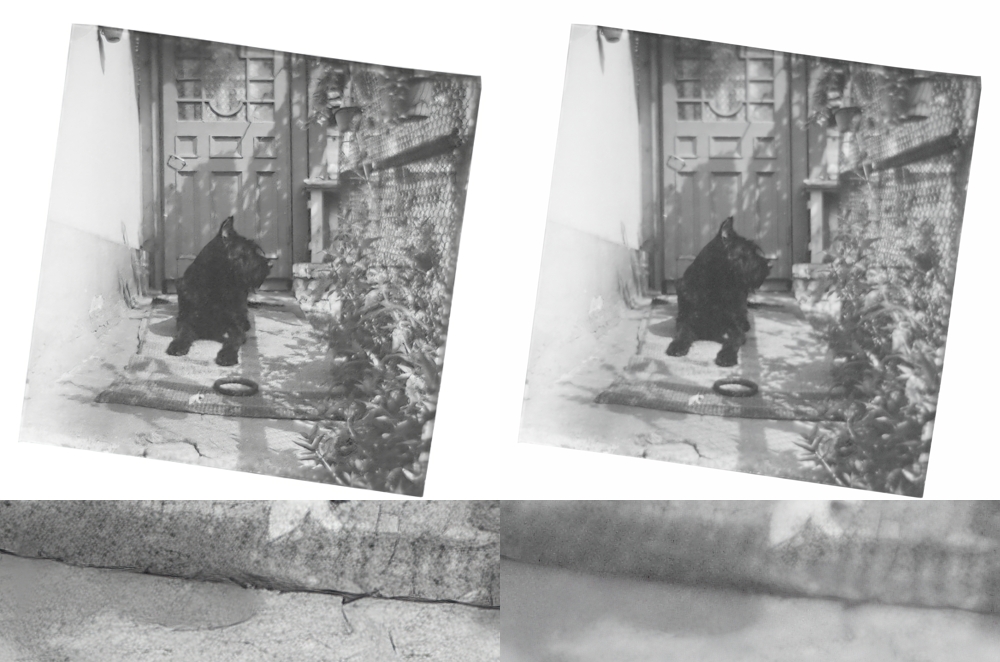
Here are some examples of how I used the generated image to help blend my manually painted patches. The top is the image as seen in the last image, the middle, clearly lower resolution image is the generated version, and the bottom is the resulting of my compositing the other two.
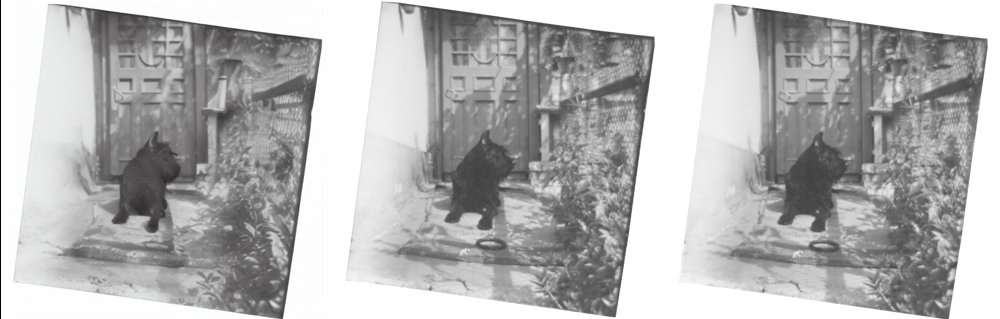
As far as the basic restoration goes, I made a couple adjustment layers, one for increasing exposure and the other for reducing it, and painted in their effects to get rid of the artifacts around the image edges. The left photo here is the funny generated image (it makes a new dog each time), the middle is the patched and blended fix, and the right has the border painted up a bit better with those adjustment layers.
That is where the restoration practically ends. If I were to deliver something to a client, I'd probably tweak the exposure and local contrast and then stop, because anything further means extensive alterations to the original image. There are many reasons and cases for image restoration, and if we are going strictly for accuracy, I would not feel comfortable messing with the image any more and still claiming it's accurate. A better scan would take me a bit further, but beyond that, a bigger print, but beyond that, I could do some wild things with a good scan of the original negative.
Before we begin part 2, I have some observations granted by the gift of hindsight. Firstly, a small image still has an incredible amount of detail in it. Our original here is scarcely larger than a stamp and was scanned in using a cheap, slightly outdated DSLR, yet after staring at it for a few hours, I've come to see details in it like the building (namely the roof, chimney, and sky) through the chainlink fence. I've spotted the shadow on the ground cast by the links in the fence, and am differentiating between the plants on the right and the shadows they cast. That weird trail to the left of the door near the top now looks like a vine with leaves trailing from a planter that is out of view.
Those are things I mostly noticed after attempting to upscale and color the image, and none of the fancy AI programs I used seemed to come anywhere near to parsing the image as well as I (eventually) did. Given a ridiculous amount of time, and some practice shaking the rust off my digital painting, I could manually reconstruct a ton of detail in the image. Whether that would be worth it, well...
Upscale
The first thing I did in part 2 was run a 1x ESRGAN model trained to denoise. The specific model was 1x ISO denoise v2. It did not do a whole lot, probably because of the denoising that I did much earlier. I made a couple demo images but the differences are so minor I don't think I'm even going to waste 200KB of bandwidth to put one here. Your mileage may vary considerably using techniques like this. I tried a deblurring model called 1x ReFocus V3 140000 G, and the effect is much stronger. So strong, in fact, that I made a transparency mask on it and blended in only the few parts of it that I wanted.
Something to always keep tucked in the side of your head is that when images are taken, not everything, or perhaps even anything, is always in focus. Now, with older shots, it's more likely that someone was zone focusing, so that either things within maybe 5m of the camera are in focus, or such that everything 5m+ is in focus, it varies wildly with the lens and what the lens was set to. It is worth noting that a lot of these old pictures are impressively sharp but nothing in focus is very close to the lens, we don't see much stuff like the closeup plant photography I present on my image page. This is all sort of a prelude to the point: don't try to sharpen parts of a photo because they are blurry, think about which parts of the photo were actually enough in focus to warrant some help. If you use generative techniques (or just a sharpen adjustment) to make everything sharper, the image will look unnatural. I mainly tried to use the ReFocus sharpen around objects within a plane at the same depth as the dog's head, which is where I'm assuming the focus was originally intended to be.
Now, the ReFocus image on the left does arguably look better than my composite on the right. I would suggest that this is the same sort of "good" as Instagram photographers saturating colors until their overcast Norwegian lake shot taken from a kayak looks like it was made with cotton candy and gemstones. If I was "going" for an image that someone would only see on their smartphone, I suppose I might stop with the ReFocus result, and hope that no one zooms in on it. If you do look closer, however, you will note some things. The sharpness is not related to the sharpness as produced by the lens, and does not obey the typical expectation that it ramps up and down before and after the focal plane. Rather, it is sharp where the algorithm decides to more aggressively make hard edges, the rules of which, as far as I know, are not spatially aware. I can foresee software in a few years that does take separate depth data into account, but that is not this.
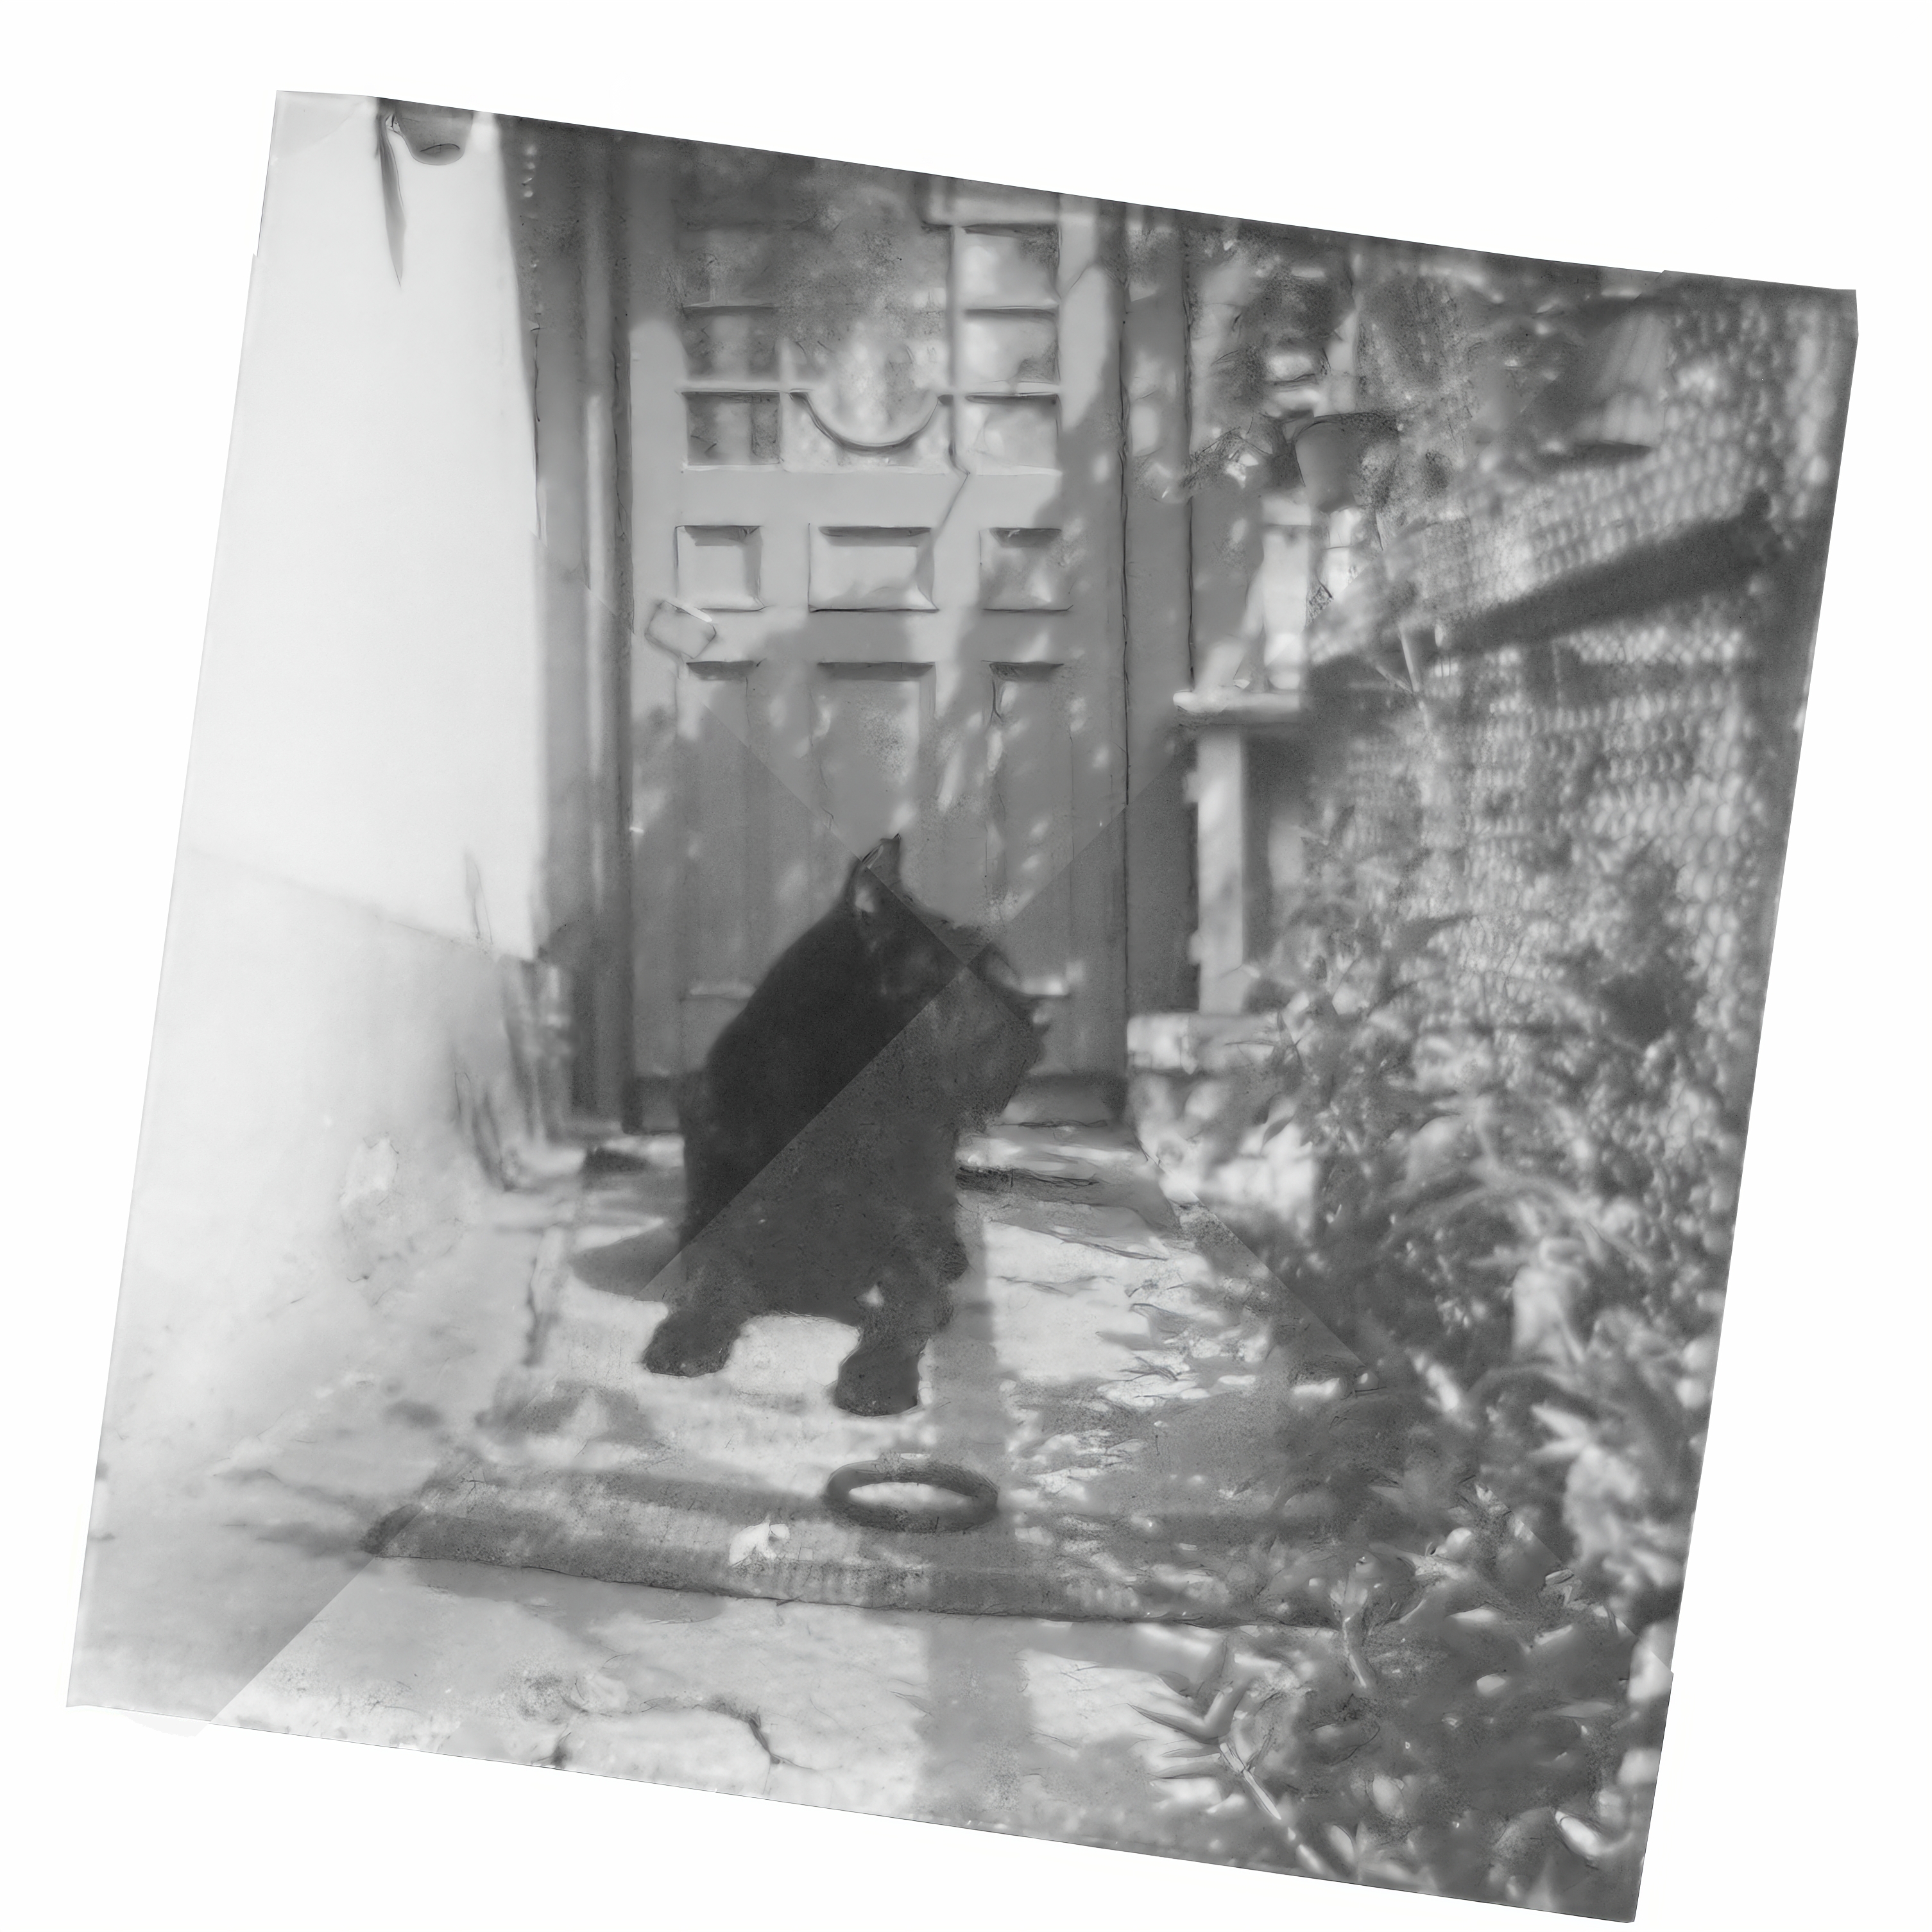
I feed my composite with a bit of the deblur back into Stable Diffusion with the same settings, hoping to get another deblur that can further emphasize the areas that I have decided will be sharper. The top and bottom parts of the next image are from this step, and the left and right portions are this 2nd deblur composited back into the working image.
Although I have been using 1x implementations of ESRGAN so far, it seems to typically be used with 4x upscalers (algorithms that attempt to recreate an images four times the resolution). I grab a few models for these, downsize my image to 1/4th the size, and try four of them out:
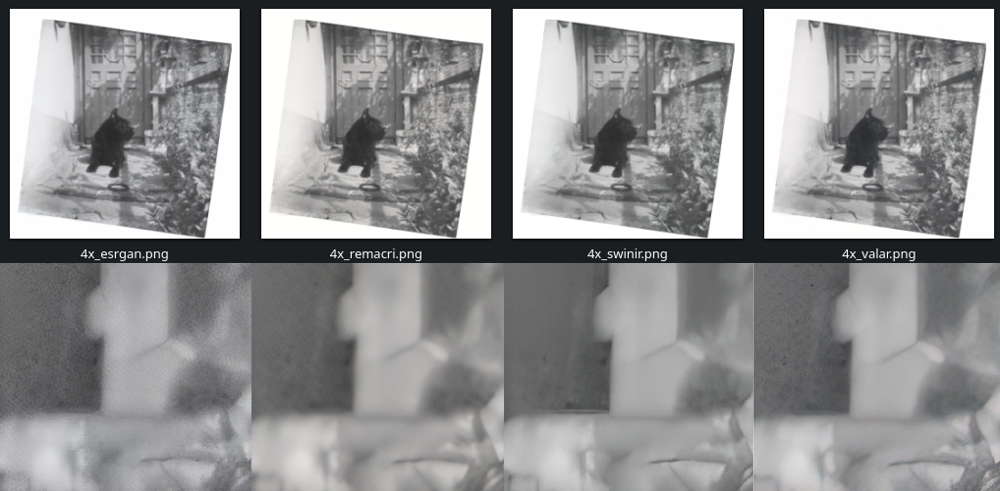
Each flavor works reasonably well, though you can see that basic ESRGAN falls behind a bit. The difference between these is essentially that ESRGAN is the original upscaler and the others are ESRGAN + additional training on different datasets. You can take a network like this and feed it extra data in an attempt to make it do something specific. In this case, these are general upscalers, though as you have read about a few paragraphs up, people are training them to do denoising, deblurring, and not utilized here but also notable: reduction of image compression artifacts, un-dithering, de-(over)sharpening, colorization, upscaling for drawn material, etc.
Taking each of these images, slapping them all into one stack, and setting a transparency mask for each, I paint in some aspects from each, fiddling with the layer opacity and blending modes as I go. Here is the result of that:
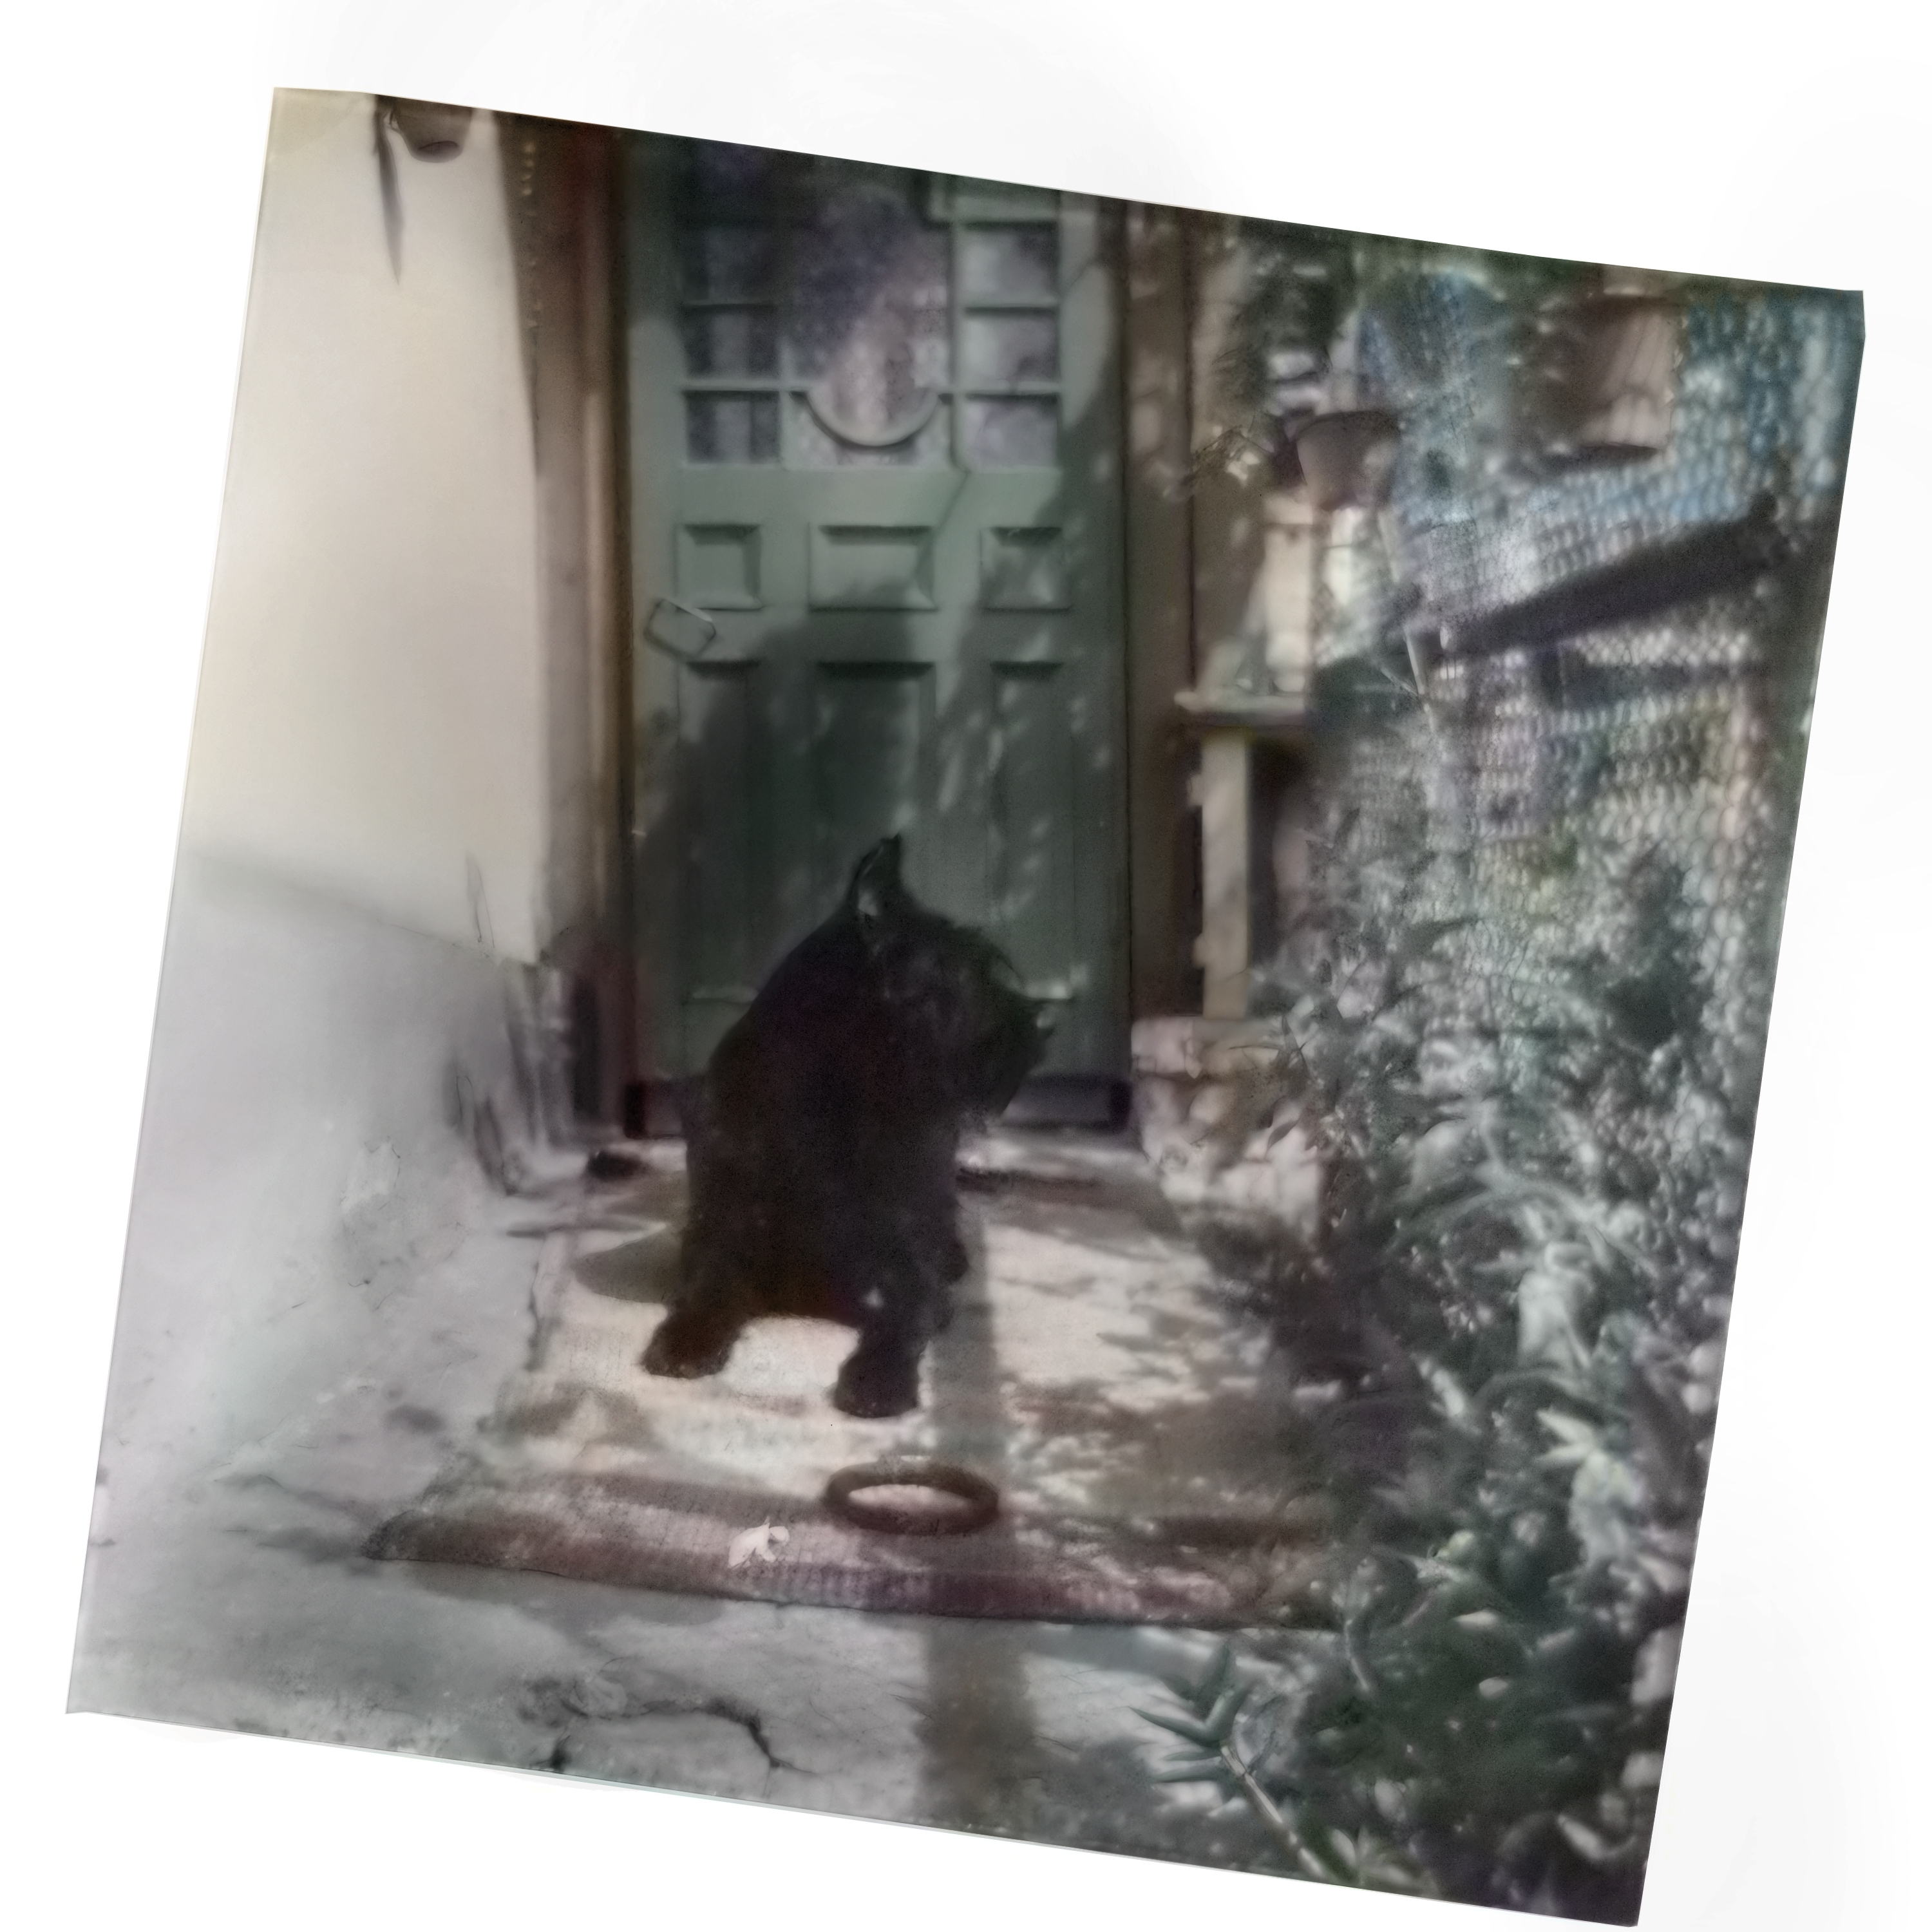
Color
If you, my dear reader, are finding each reveal to be quite underwhelming, my apologies. My intent with this restoration is to be subtle and respect the original look of the image, even if we have delved into some heavier editing. With the tools I have used thus far, especially the scary AI ones, we can only go so far in recreating content that is not in the original image. With a good dataset comprised of the right architecture and breed of dog, we could probably have a model that does a decently faithful job of guessing what the image should look like, but I don't have enough VRAM to train that model. Plus, I am doing this restoration for fun, and to build up some skills. The approach that is a bit closer to the hand would be to do a bunch more digital painting under some filters that mimic grain.
For adding color, I've made a blank layer under the image, set the image blend mode to luminosity, started at one random color at the edge of the color wheel, and painted in where I figured that color would be. Then I moved about 15 degrees along the color wheel, painted in where I thought that would be, and repeated the process until I went around the wheel a couple times.
Having been to this area a few times, I knew that the popular house colors are this specific yellow-ish tan, and there is this dark-ish green paint that is everywhere. Many metal surfaces are painted over with rather gaudy bright paints that manage to somehow look extremely dull at the same time, and when you get close to things, you see the paint chips flecking off. I forget if that side curb and floor were bare concrete or not, and the lightness difference between the areas that are cracked and smooth isn't big enough to make me sure. Something you have to remember about these old black and whites is that the film exposure is a chemical reaction, and the way the luminance comes out is a product of the material's sensitivity to various levels of various frequencies of light. The way that color film with a black and white/desaturation filter on it looks may very well be different than the same shot taken with black and white film. Accordingly, a good chunk of my "color" painting was also adjusting the lightness by putting an adjustment layer on the top image and painting in certain places to be darker. I think when people are restoring images, if something is not quite the right tone, rather than thinking that their luminance is off, they assume that the color is wrong, and slap on more saturation. I might go in with as little as 2% opacity when adding a color, and later rely on adjusting the luminance to get the shade right. My end result is still reminiscent of the "bright blue eyes and lips with powerful pink lipstick" look of many colorizations, but I'll chalk that up to a lack of practice, and uncertainty about what color the various bits of wood around the door should be.
Join me next time, as we redo every frame of Nosferatu with MS Paint using the DK Bongos as the only means of input.
Nick